
Let’s talk peep sight — it’s time to tackle the visual key in our shot process. We’ve hammered out our stance, grip, shoulders, and anchor position through the weeks. Now we’re diving into the peep, a piece that trips up even seasoned bowhunters.
Here’s the critical thing to understand — your peep sight isn’t where aiming begins. It’s where you confirm your form is locked in solid and you then see through the peep hole that unlocks a new door to greatness. That’s exactly why it comes after your anchor in the shot sequence.
The Peep’s Place in Your Shot Sequence
Most folks get this backward. They treat that peep like a rifle scope, focusing on it right away during the draw cycle. We all know what happens when you focus only on looking through a rifle scope without properly shouldering it first… you get scoped right in the eye.
The same principle applies here, only you won’t get scoped in the eye, you will get arrows that are erratic and inconsistent on the target.
I see it all the time — archers raise their bow while staring at the peep, tracking it the whole way back. The result? Floating anchors, jammed shoulders, and arrows spraying everywhere.
When starting your shot sequence, you need to forget about the peep. Your anchor position must be locked in before you even think about your peep — this is absolutely fundamental to accuracy. Imagine it’s not even in the string until you’re anchored.
Remember the sequence up to this point: stance, grip, shoulder, anchor, and only THEN find your peep. Maintain your posture, keep your draw arm parallel to your front arm, and position your anchor so your arrow shaft sits in the safe part of your face. Only after all that is established should you adjust your head to find the peep.
Get this right, and you’ll knock out one of the biggest accuracy killers in bowhunting.
Head Position and Peep Sight Alignment
Once you’ve locked in your anchor, your head position becomes the next consideration for proper peep alignment. This is a subtle adjustment that comes AFTER you’ve anchored — not before.
Try this mental image: your head is on a swivel that pivots at your neck — almost as if you have long hair that’s tied up and pinned to the ceiling directly above you. If you simply pivot your head like it’s on a swivel, you won’t feel a thing. However, if you tilt your head forward towards the bow or leaned your head back, you would pull some hair out. Keep you head vertical, inline, and on a swivel.
At full draw with a solid anchor, keep your head upright and simply turn toward the target. This keeps your form rock-solid while bringing that peep naturally into your line of sight.
Specific shooting situations — with variation in shot angle, shot distance, or the sight’s position on the bow — will require some head position adjustment. But NOT in your anchor. When shooting closer distances, that sight moves higher up on the bow. At longer distances, your sight will be lower on the bow.
Sometimes acquiring a perfect peep position requires the nose to have more pressure on the string, whereas the longer distances you will need less to look at it lower down. All of these scenarios require slight adjustments, but here’s the key: maintain your anchor and posture no matter what. Adjust the head, NOT the anchor.
Think of looking through a peephole in a hotel door — if someone tall is outside, you may need to lower your head and look up to see them; for someone shorter, you raise your head to look down.
Similarly, with your bow, once your anchor is set, you make minimal head adjustments to look through the peep at your target. Your anchor should remain rock-solid while you make these subtle head movements to maintain proper sight picture. It’s critical the arrow isn’t having a different position or pressure on it depending on the distance. By focusing on the peep last then you assure this happens.
For those longer shots where your sight is positioned low, you might need to relax your jaw slightly while keeping your anchor position fixed. This allows you to look through the peep with your head still straight. The essential point is this: adjust your head position minimally after establishing your anchor. Never compromise your anchor or posture to find your peep.
Front and Rear Sight Alignment
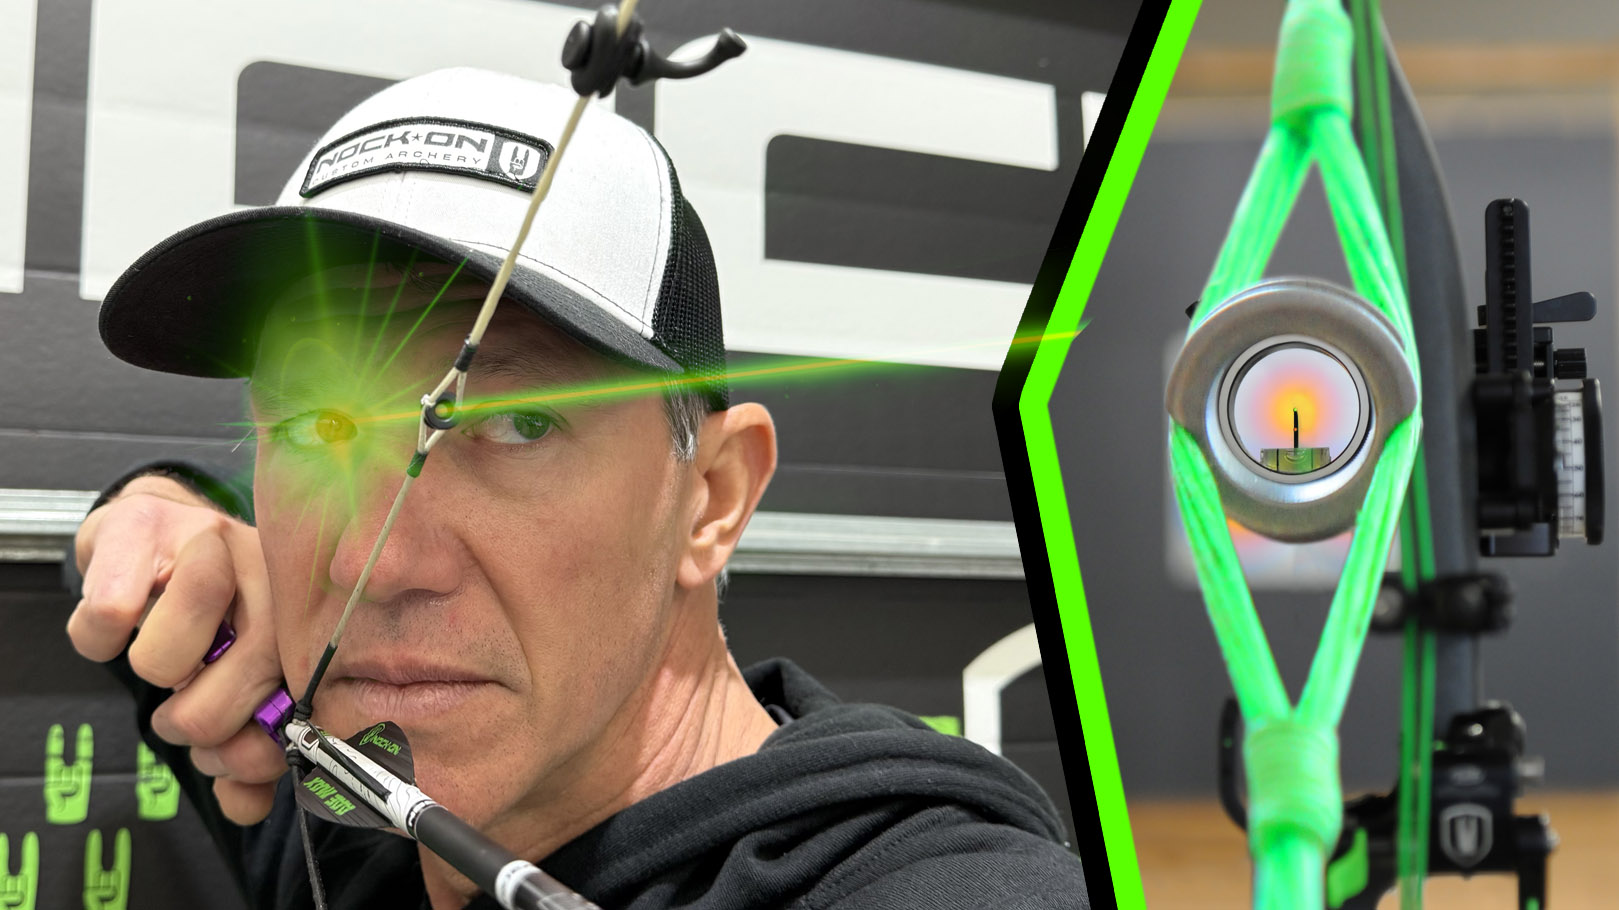
Once you’ve locked in your anchor and found your peep, you have to nail the alignment between your peep and the bow sight. Together, they create a two-circle system that needs to be perfectly concentric for dead-on accuracy.
This is exactly why I prefer a WHITE high-contrast sight ring. That simple white circle around the housing gives you instant feedback against the black peep. When you’re dialed in, that white ring sits perfectly centered in your black peep circle. If the white disappears on one side or you see daylight on the other, you’re off.
 1")
If your peep is on the edge of your bow sight one time, and then the next time you’re covering that white ring, think of that width difference. If you were to readjust sight and move it that same distance, you’d impact very differently downrange.
 2")
The tiniest of variations in how you center these two circles can change your impact — maybe only several inches up close, but it’s more severe at longer distances. Any breakdown in posture, anchor, or head position shows up immediately in your sight picture.
Practical Field Applications
Think of your bow at full draw like a triangle that’s locked in place. Your job is to work within this fixed geometry of the bow at full draw, not fight against it. That’s why all of the earlier shot sequence steps have put you into the perfect position to fit this triangle while keeping the arrow in the perfect place to launch.
In reality though, hunting puts us in some awkward positions. You may be 20 feet up a tree or side-hilling a mountain, but your bow’s fixed triangle doesn’t change one bit. Your body has to adapt while keeping those form fundamentals intact and following the same sequence — anchor first, then find your peep. Pivoting your waist is what allows you to shoot on angles, while still fitting the triangle perfectly.
In a treestand, when possible, draw your bow level first, then pivot at your waist down to the deer. When that movement would blow your cover, cut the difference in half — partially adjust before drawing, then finish pivoting after hitting full draw. That way we can focus on stance, grip, shoulder down and forward, draw them back, anchor, find the tip of the string, look through the peep, center the front sight & peep sight… and then bend the rest of the way down to the animal.
Remember, the longer you hang at full draw trying to get everything perfect — aligning your front and rear sights, getting the pin on target, leveling the bubble — the more your muscles fatigue and accuracy tanks. That’s why dialing in your peep acquisition through proper sequencing is make-or-break in real hunting situations.
Conclusion
Your peep sight is the checkpoint that confirms everything else in your shot process is on track. Get it in the right spot in your sequence — after you’ve locked in that anchor — and you can maintain the form that drives accuracy.
Keep that alignment between peep and sight housing consistent for every single shot. When buck fever kicks in and that giant steps out, this systematic approach means your peep becomes your pathway to success: Stance, grip, shoulder down and forward, draw, anchor… then peep.
Next time, we’ll dive into the final critical step that brings this whole shot process together. Until then, drill this sequence until it’s second nature.
