
Ever notice how the best archers make shooting look effortless? See that smooth, consistent release where the arrow seems to break free at the perfect moment without any visible movement from the archer?
What you’re witnessing isn’t just talent. It’s proper back tension combined with proper alignment, which anyone can learn with the right guidance.
In this blog post, I’ll explain how to develop proper back tension, why it matters for accuracy, and how to retrain your shot process using simple tools and techniques that work regardless of your experience level.
The Bicep Trap: Why Your Rear Elbow Position Changes Everything
When I coach archers, I can usually identify their biggest accuracy issue with a single glance at their drawing elbow. That slight angle, whether the elbow is pointing down toward the ground or straight back behind them, changes which muscle groups fire during the shot.
Picture this: You draw your bow, anchor solidly, and start applying pressure to execute the shot. If your elbow is dropped down, you’re automatically recruiting your bicep and deltoid (shoulder) muscles to do the work. These muscles are not the desired ones to recruit in order to have a proper follow-through.
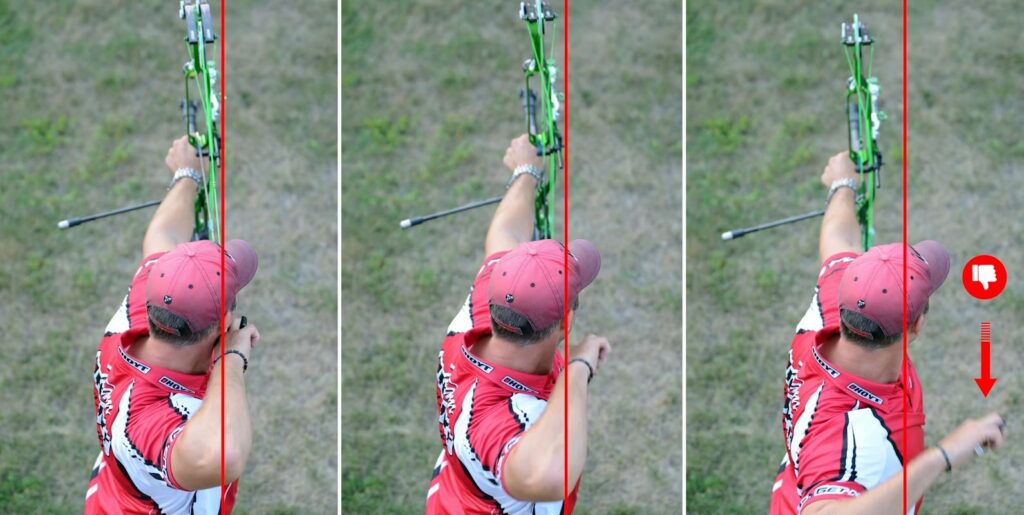
This explains why so many archers struggle with consistency: They’re using muscles that create a platform that causes the follow-through to come out and away rather than in line with the string and front hand. The result is lateral movement during release that pushes arrows off target.

The Mechanical Difference
The mechanics here are straightforward. When your elbow drops:
- Your bicep becomes the primary pulling muscle.
- Your deltoid (shoulder) gets heavily activated.
- Both muscles create rotational forces on release.
- Your follow-through moves outward rather than straight back.
- Arrow flight becomes less predictable.
This isn’t theory. It’s observable physics. When you pull with your arm muscles, the release hand travels in an arc away from your face during the moment of truth. This sideways motion transfers to the string, which transfers to the arrow.
No amount of practice or expensive equipment can overcome this fundamental mechanical flaw.

Engaging Your Rhomboids: The Foundation of True Back Tension
The solution is a simple adjustment: bringing that drawing elbow up to be parallel with the ground or parallel to the front bow arm.

When your elbow comes up to level, your rhomboid muscles (between your shoulder blades) automatically engage. These larger, more stable muscle groups provide the consistent pressure you need for a clean release.
The difference is immediately noticeable. When properly aligned, you’ll feel tension on the inside of your rear shoulder blade rather than in your arm. That’s the sensation you’re looking for: a solid contraction of those back muscles as they hold and release the string.

The Correct Execution Sequence to Experience Proper Back Tension:
- Draw to anchor with your elbow slightly elevated.
- Establish proper alignment (bow arm, arrow, and drawing elbow form a straight line).
- Focus on pulling the tip of the rear elbow to a wall straight behind you at your six o’clock.
- Continue pulling your elbow straight back to maintain steady pressure while the rear rhomboids are naturally squeezing.
- Allow the release to break as a surprise while maintaining back tension and natural follow-through.
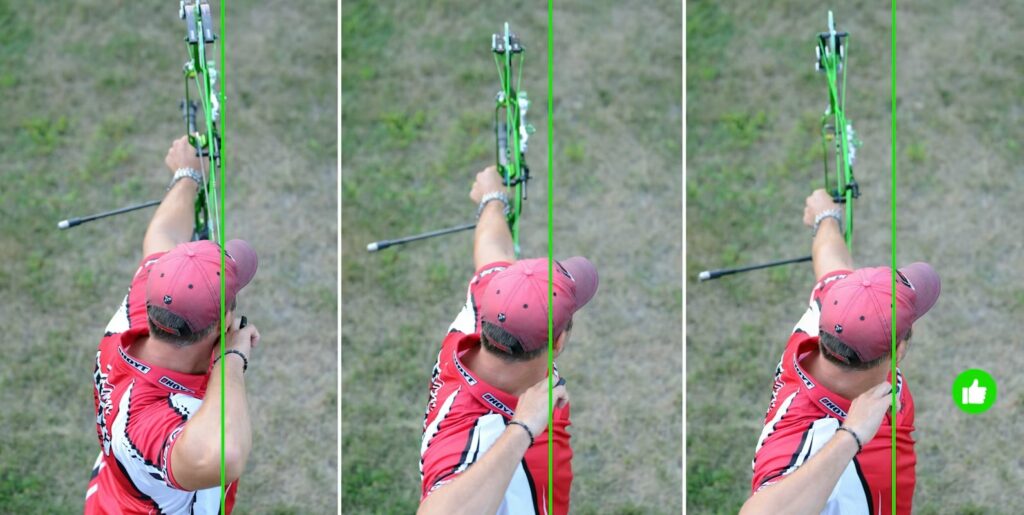
This technique eliminates the conscious triggering of the shot that leads to target panic. Instead, the release becomes a natural conclusion to building proper tension, breaking clean without disturbing your sight picture. BUT MORE IMPORTANTLY the release hand finished the shot over the rear shoulder.
Training Tools That Accelerate Learning
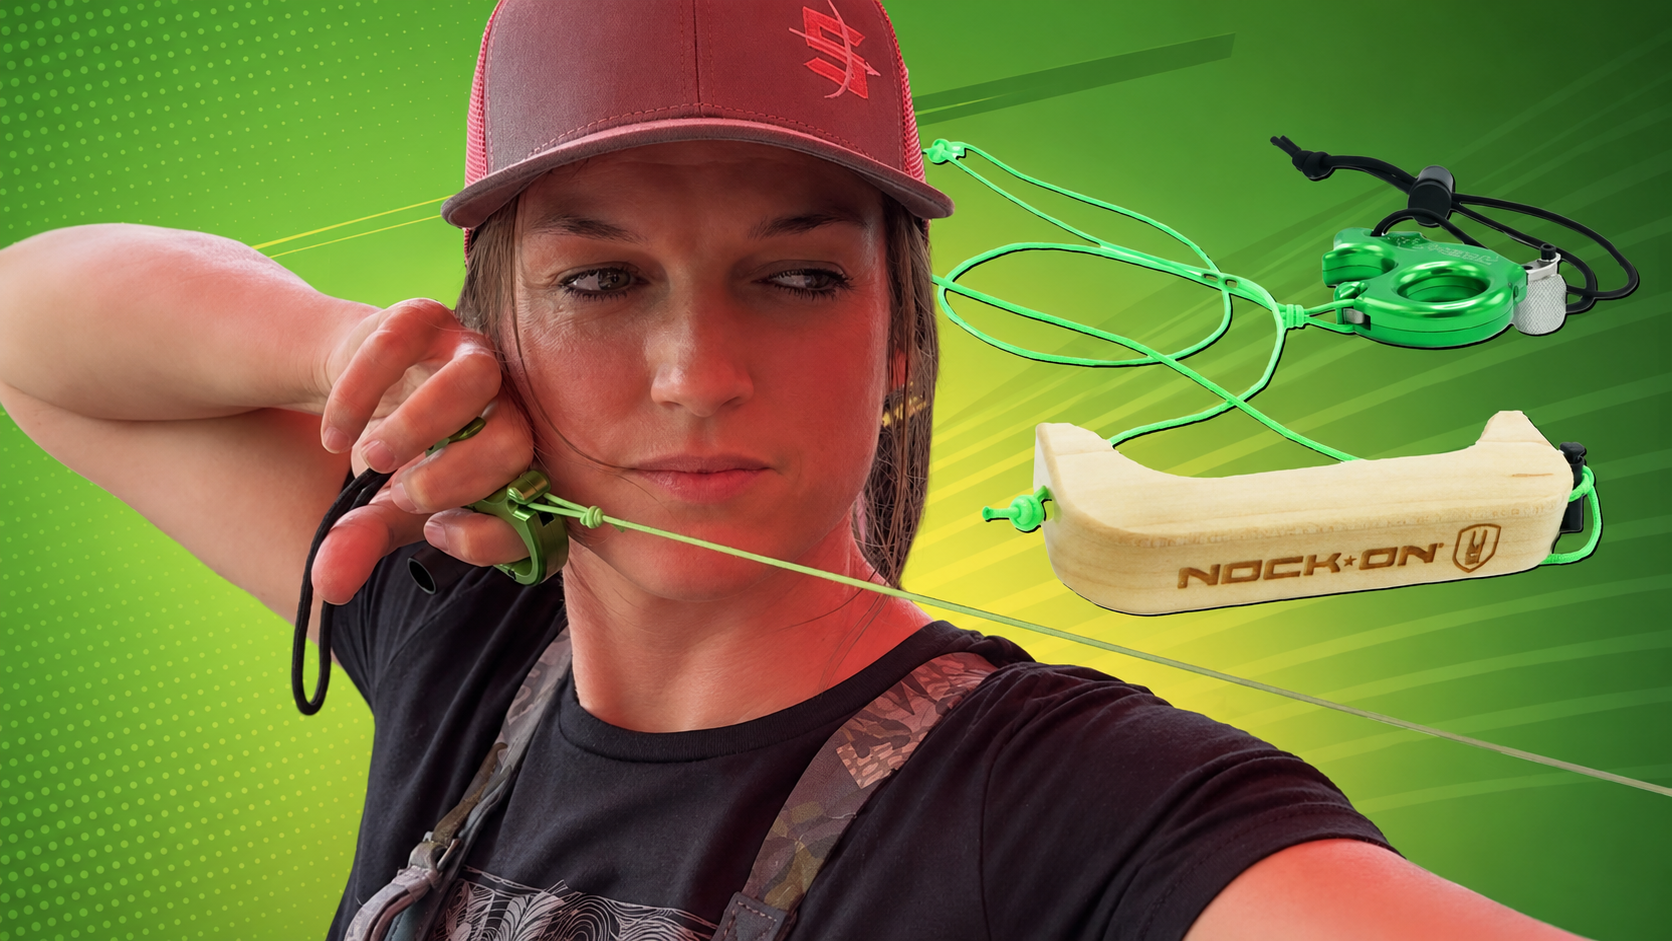
One of the most effective ways to develop proper back tension is by using a simple shot trainer. These inexpensive tools let you isolate the mechanics without being under the full load of your bow at full draw and the distraction of actually shooting.
If you are new to having the rear arm parallel to the front bow arm, then the trainer is so much easier for learning because you aren’t trying to make a technique change while also trying to fit your bow’s peep height and draw length. Chances are those could be a little off, and learning this technique without the bow is very helpful.
A shot trainer typically consists of:
- A handle representing your bow grip
- A cord representing the bowstring
- A loop or attachment for your release
This training method lets you focus entirely on feeling the right muscles activate. Without the weight of a real bow, you can clearly identify when you’re engaging your rhomboids versus your biceps.
This simple training approach leads to immediate feedback. When you execute correctly with your rhomboids, the release breaks cleanly, and your hand travels straight back along your jawline. But when you use your bicep, your hand moves outward in an arc, immediately showing the flaw in your form and causing the release hand to go down and out away from your face.

Converting Practice to Performance
The transition from training to actual shooting happens quickly once you’ve established the proper feel. Many archers experience an “aha” moment when they execute a perfect back-tension release for the first time.
Start by practicing with the shot trainer for five to 10 minutes daily, focusing on:
- Maintaining the correct elbow height
- Focusing on the rear elbow tip pulling to the six o’clock position behind you
- Feeling the rhomboid engagement, not the bicep, for the pull
- Creating a smooth, consistent follow-through
After a week of dedicated practice, introduce the same movements with your actual bow at close range (five to 10 yards). Don’t worry about accuracy initially. Just focus on recreating the same muscle engagement and follow-through pattern you developed with the trainer.
Proper back tension makes shooting easier, not harder. You leverage the correct muscle groups designed for this type of controlled contraction instead of the massive groups that are tough to duplicate. Once mastered, this technique reduces fatigue, improves consistency, and eliminates many common shooting flaws.


Putting It All Together
Learning proper back tension isn’t complicated, but overcoming established habits requires awareness and practice. We can break this process into three simple phases:
- Recognition: Understand which muscles should work to activate the shot (rhomboids, not biceps).
- Training: Use a shot trainer to establish the correct feel without distractions and force of your bow.
- Application: Transfer the technique to actual shooting, focusing on process over outcome.
Your elbow position is the master switch and lever that determines which muscles fire and how easy or difficult the arrow will go off. Keep that elbow parallel to the ground, and you’ll recruit the right muscle groups for consistent, accurate shooting.
The best part about mastering back tension is that it works regardless of what equipment you use. Whether you’re shooting a traditional bow, a modern compound, or an Olympic recurve, the mechanics remain the same.
This isn’t a technique. It’s human biomechanics applied to archery.