
Shimming isn’t a part of the bow. It’s a term that applies to multiple areas of your compound or recurve bow, and it’s one that’ll make a lot of other concepts click once you understand it.
At its core, shimming means using washers, spacers, pads, or wedges to shift or adjust the position of a component for better tuning or performance.
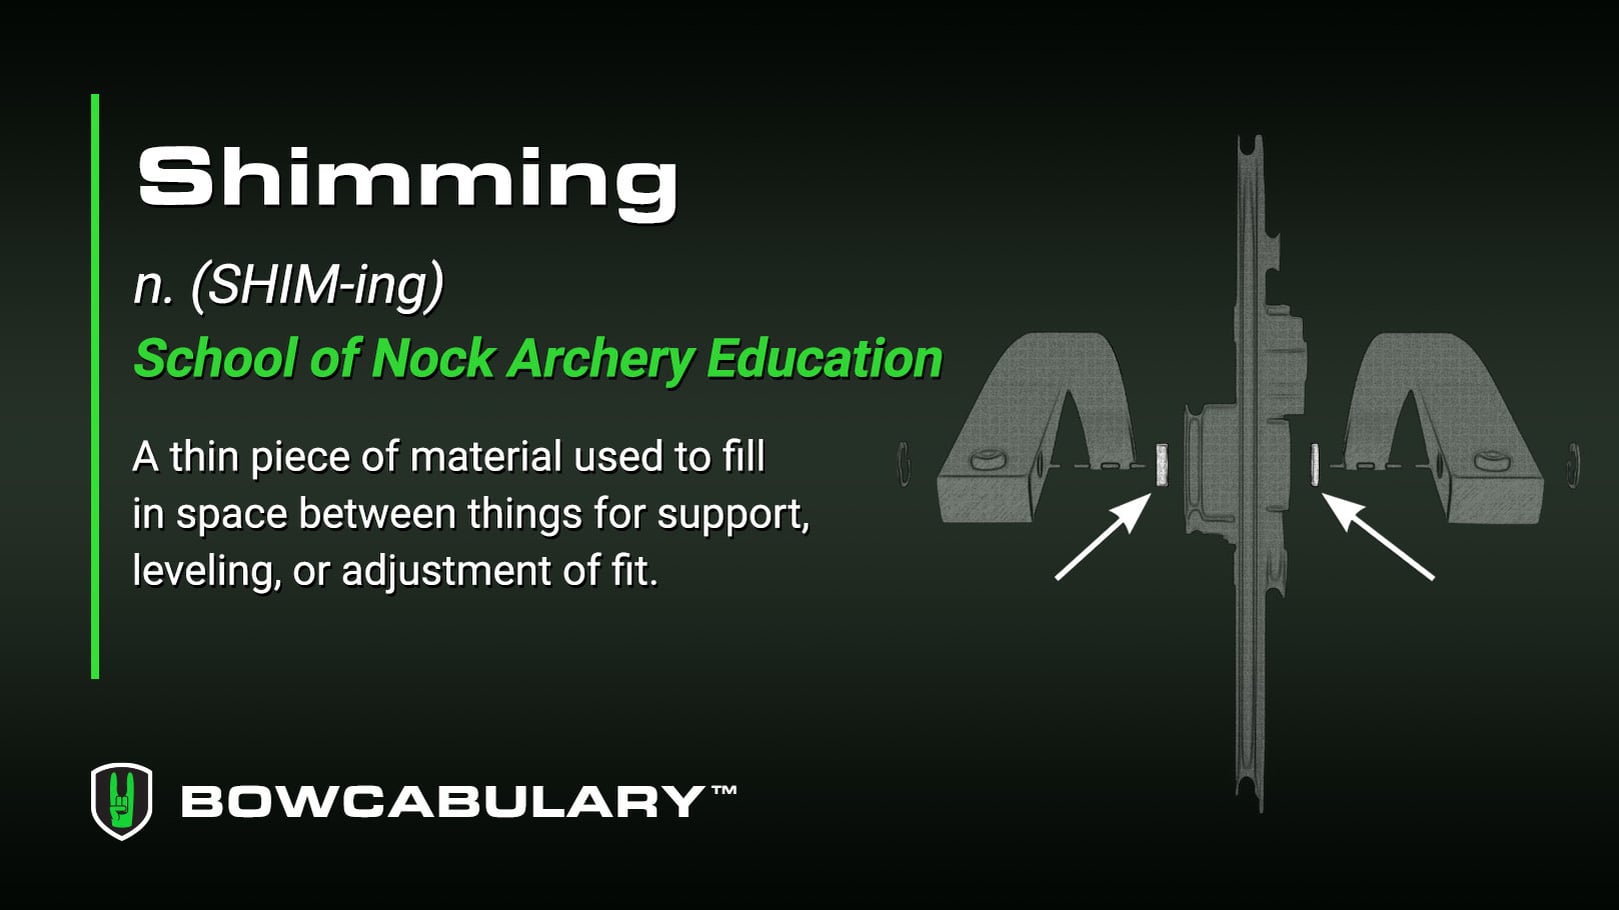
Cam Shimming
One of the most talked-about applications is shimming your cams. Companies like Hoyt use spacer kits with color-coded sets (black, red, and gray), each with a thick and thin spacer.

The combinations shift the cam’s position between the two limbs, and keeping the colors matched matters. If you mix a red with a gray, the total spacing is off, and you’ll get slop within the limb.
Hoyt bows typically come standard with a thick silver spacer on the right and a thin one on the left (looking from behind the bow). I flip mine, running a thin on the right and a thick on the left, so my arrow runs down the center of the riser and my string sits where I want it. That setup matches the grip technique I teach, where I focus on less hand pressure and no front pressure on the bow.

Hoyt determines their factory shimming position by giving test models to internal archers and pro staffers, then averaging where everyone lands on the center shot based on their grip. My grip style produces a slightly different pressure point on the riser, which is why I adjust from the factory setting.
PSE used a similar approach with what they called a 220 system. The total spacing amount was always 220, with three different combinations that allocated more on one side and less on the other. Some companies take a different route and build adjustability into the axle itself, letting you shift the cam without swapping spacers.

Limb Pocket Shimming
Shimming limb pockets is how you adjust poundage outside your limbs’ standard range. Some manufacturers offer thin pads that go on the underside of the pocket. That pad increases the leverage on the front of the limb, creating more preload and adding a few pounds of draw weight.
If you’ve ever heard someone say they’re shooting 73 pounds on a 70-pound bow, a shimming pad is likely the reason. I shoot 63 to 64 pounds at TAC events, and I get there by putting pads in the pockets with my 60-pound limbs.

Hoyt’s XTS system takes this a step further. It has a built-in wedge system controlled by screws on either side of the pad. Tighten both sides all the way, and the wedge drives against the front of the limb, creating more preload and more poundage. You can use the XTS to micro-tune your poundage without pulling the bow apart and swapping pads.
Limb Alignment
Shimming limbs within the pocket is about making your limb run true. If a limb has any cant to it, that offset worsens the farther out from the riser you go. Older solid-limb Mathews bows used a triangular-shaped limb tip that would wedge forward and take up space on the side to keep the limb tracking straight.

Recurve bows handle this, too. On a 72-inch recurve, even a small misalignment at the riser creates a bigger problem at the limb tips. Many recurve risers let you adjust the limb bolt or the rocker where the limb sits to correct for that.
Cable Rod Shimming
The cable rod or roller guard position affects torque on the riser. The closer your inside cable sits to the arrow shaft (without contacting your fletching), the less torsional torque it puts on the riser. Most companies now pre-position their roller guards with this in mind.
If that spacing isn’t shimmed correctly, the torque can push your pins outside of your arrow shaft at full draw.
Once you understand shimming in one area of your bow, the concept starts connecting across your entire bow: cams, limb pockets, limb alignment, and cable systems.
