
Ever pulled out that bow catalog after a compound bow string replacement and checked your axle-to-axle length or brace height, only to find “Mine’s different… did I mess something up?” You’re not alone. As someone who’s set up more bows than I can count, I can tell you this is one of the most common concerns I hear from archers and bowhunters when they’ve completed a compound bow string replacement.
The truth? Those factory specs have a little asterisk next to them for a reason. They’re approximate, not gospel. And there are several legitimate reasons why your measurements might differ slightly from what’s listed on paper, especially after replacing compound bow strings and cables.
Let me walk you through what’s really happening during compound bow string replacement, what actually matters, and how to make sure your bow is performing at its best regardless of what the tape measure says.

AVAILABLE PRODUCTS FEATURED IN THIS VIDEO


When to Consider Compound Bow String Replacement
Before diving into measurement issues, let’s address when you should actually replace your compound bow strings:
- Age: Most manufacturers recommend replacing strings every 2-3 years, even with limited use
- Shot count: Consider replacement after approximately 2,500-3,000 shots
- Visible wear: Fraying, serving separation, or fuzz on the string material
- Performance issues: Inconsistent arrow flight or changes in draw weight/length
- After prolonged storage: Strings can deteriorate even when not in use
Timely compound bow string replacement prevents unexpected failure and maintains optimal performance.
The Invisible Factors Affecting Your Bow’s Geometry After String Replacement
When I was working with manufacturers, we constantly dealt with the challenge of listing “exact” specifications. The reality is that multiple variables affect these measurements during compound bow string replacement, and they’re impossible to completely standardize.
Here are the major culprits behind those measurement discrepancies:
Serving Diameter: The Hidden Game-Changer in String Replacement
The most significant factor in compound bow string replacement is the serving material wrapped around your strings and cables. This is the part that sits in the cam tracks, and even tiny differences in diameter create noticeable changes in your bow’s geometry.
Think about it: if your new serving is thicker than what came from the factory, it sits higher in the cam track. This effectively shortens the entire string/cable system, which decreases your axle-to-axle length and increases your brace height. If your new serving is thinner, you’ll see the opposite effect—it’ll sit deeper in those grooves, essentially making your system “longer.”
I’ve seen countless archers chase their tails trying to match factory specs without considering that their custom strings might have different serving diameters than what originally came on the bow.
String Material: Not All Colors Are Created Equal
Here’s something most archers never consider during compound bow string replacement: string color affects diameter.
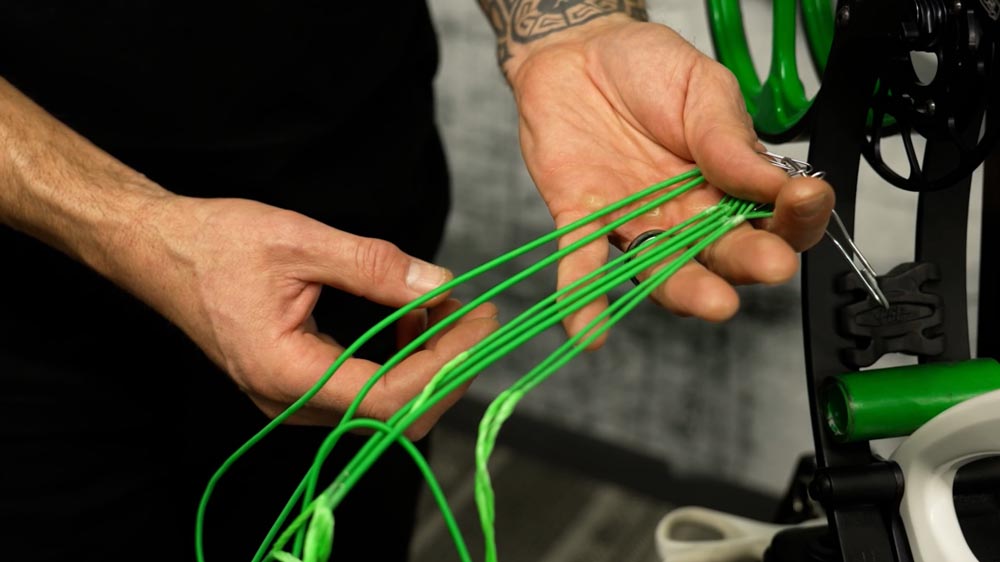
Black and white string materials have significantly less wax content than bright-colored strings. Why? Bright colors need that extra wax to hold the dye. So if you’ve swapped from factory black strings to some flashy neon green custom threads, you’ve inadvertently changed the strand diameter.
This small difference might only be a few thousandths of an inch per strand, but multiply that by 20-24 strands, and suddenly you’ve got enough variation to change your measurements after compound bow string replacement.


Step-by-Step Compound Bow String Replacement Guide
If you’re planning to replace your compound bow strings yourself, follow these steps for best results:
- Gather the necessary tools:
- Bow press (essential for compound bows)
- String wax
- Serving tool (if reserving is needed)
- Allen wrenches/hex keys
- String separator
- Calipers for measurement
- Record your current settings:
- Take photos of current string routing
- Mark cam positions relative to limbs
- Measure and record axle-to-axle length
- Measure and record brace height
- Note cam timing positions
- Press the bow safely:
- Ensure the bow press is properly set up
- Position the bow correctly in the press
- Apply just enough pressure to relax the strings
- Remove old strings and cables:
- Note the exact routing of each component
- Remove strings one at a time
- Clean cam tracks and modules
- Install new strings and cables:
- Follow the same routing pattern as original
- Ensure strings are seated properly in tracks
- Apply string wax to new components
- Initial adjustment and tuning:
- Adjust string/cable length through twisting
- Set approximate axle-to-axle length
- Check cam timing and synchronization
- Verify draw length and draw weight
- Break-in period:
- Shoot 50-100 arrows to allow strings to settle
- Recheck all measurements
- Make final adjustments as needed
Making Practical Adjustments After Compound Bow String Replacement
Rather than obsessing over getting your bow’s measurements to match catalog specs exactly after compound bow string replacement, here are some practical approaches I’ve developed over decades of bow setup:
The Pre-Change Reference Method
Before you remove those factory strings for compound bow string replacement, create a reference point. I like to mark the cam’s position relative to the limb, either with a pencil mark directly on the cam or by placing a small piece of scotch tape on the cam and making a mark there.
This gives you a perfect reference point. When you install the new strings, you can simply add or remove twists until that mark is aligned with the same spot on the limb. This ensures your cam rotation stays exactly where it was with the factory setup, regardless of what your tape measure says.
Consider Your Draw Weight Settings
If you’ve adjusted your draw weight from factory settings before or after compound bow string replacement, your measurements will change. It’s simple physics:
- Backing out limb bolts (reducing poundage): The limbs relax outward, increasing axle-to-axle length and decreasing brace height
- Tightening limb bolts (increasing poundage): The limbs compress inward, decreasing axle-to-axle length and increasing brace height
Factory specs are typically measured at maximum poundage (limb bolts fully tightened). If you’re shooting at a lower poundage after compound bow string replacement, your measurements should be different from the catalog.
Match Your Cam System to Factory Specs
Different cam options on the same bow model will yield different specifications. Using this bow as an example, you could have an S2 cam, E2 cam, or EC2 cam… each with slightly different geometries.
Make sure you’re comparing your measurements to the specs for your specific cam system during compound bow string replacement, not just the bow model. The distance from the string track to the axle can vary between cam options, directly affecting both brace height and axle-to-axle length.
Breaking In New Strings After Replacement: Let Them Settle
New strings need time to settle in after compound bow string replacement. Your old strings have been under tension, stretched, and have found their final length after hundreds or thousands of shots. A brand new set, even if pre-stretched during manufacturing, will still see some initial settling.
Before you get obsessive about specs, put 50-100 shots through your bow with the new strings. This breaks them in and allows them to reach their final dimensional state. Then make your final adjustments.
What Really Matters After Compound Bow String Replacement: Performance Over Specifications
Here’s what I’ve learned after decades of bow setup and compound bow string replacement: being close to specs is good enough. What truly matters is:
- Draw weight: Is it where you want it for your hunting or competition needs?
- Draw length: Is it correctly matched to your body?
- Timing: Are your cams synchronized properly?
- Tune: Is the bow shooting accurately and forgiving?
I’ve set up countless bows after compound bow string replacement that didn’t match the exact factory specs but shot absolutely lights-out. Those factory numbers are guidelines, not commandments.
Final Thoughts on Compound Bow String Replacement
Compound bow string replacement doesn’t need to be stressful. Don’t let slight measurement variations worry you after installing new strings. As long as your bow is tuned well, shooting accurately, and feels good in your hands, you’re in good shape. Remember that even identical bows with identical strings can show small variations due to manufacturing tolerances.
Focus on how the bow performs after compound bow string replacement, not what the tape measure says. Because at the end of the day, the target (or the animal) doesn’t care what your brace height is, only that your arrow finds its mark.
Get close, get it shooting well, and get out there and enjoy your time on the range or in the field. That’s what truly matters after completing your compound bow string replacement.
