
Ever watched your arrow sail high over a buck’s back on a steep downhill shot? Been there. That frustrating moment when you’ve done everything right… except account for the angle shooting adjustment.
While modern rangefinders with angle compensation are fantastic tools, there’s value in understanding the raw mechanics behind angle shooting calculations. Back when I competed in professional field archery, we didn’t have fancy tech doing the math for us. We needed a reliable angle shooting system — a cheat code — to nail those tricky angled shots with dead-on accuracy.
I’m going to share my battle-tested method for angle shooting calculations to find the perfect yardage on steep shots, whether you’re perched in a treestand or shooting across a ravine. This simple technique has helped me connect on countless difficult angle shooting scenarios over the years, and it might just save your next hunt when technology fails.
The Physics Behind Angle Shooting: Why Gravity Changes Everything
Here’s the simple physics that every serious archer needs to understand about angle shooting: your arrow isn’t affected by the full line-of-sight distance on angled shots. Instead, gravity only works on the horizontal component of that distance.
Picture yourself on a ridgetop, aiming at a target in the valley below. Your rangefinder might tell you it’s 40 yards away in a straight line. But the actual horizontal distance (the distance gravity is working on during angle shooting) ****is shorter. If you aim for 40, you’re going to shoot high because your arrow won’t drop as much as you think it should.
The steeper the angle, the bigger this discrepancy becomes. At 30 degrees, the difference is significant enough to blow your shot completely.
The angle shooting formula isn’t complicated:
- Steeper angle = Bigger yardage adjustment needed
- Flatter angle = Smaller yardage adjustment needed
The Ultimate Angle Shooting Cheat Code: Your Compensation Chart
Instead of carrying around a scientific calculator or hoping your battery-powered rangefinder stays charged, I developed a simple percentage-based angle shooting system. It’s essentially a cheat sheet that tells you what percentage to cut off your line-of-sight distance based on the angle.
Here’s the practical angle shooting breakdown:
- Determine your line-of-sight distance with your rangefinder (let’s say 40 yards)
- Measure the angle using a smartphone app (let’s say 35 degrees downhill)
- Check your angle shooting cheat sheet to find the correct percentage adjustment (19% for 35° downhill)
- Do the quick math (40 yards × 0.19 = 7.6 yards)
- Subtract that number from your line-of-sight distance (40 – 7.6 = 32.4 yards)
- Set your sight for 32 yards (rounded for simplicity)
The beauty of this angle shooting system is its reliability. It’s based on physics, not batteries or electronics that can fail in the field. Once you understand it, you can make these angle shooting calculations almost instinctively.
Creating Your Own Angle Shooting Compensation System
Getting started with this angle shooting method requires just two things:
1. A Reliable Angle Finder
Download a free angle finder app on your smartphone. I use one called “Angle Pro,” but there are dozens of options available. These apps use your phone’s built-in gyroscope to measure angles accurately for precise angle shooting.
To measure the angle to your target:
- Hold your phone vertically along its long edge
- Aim the top edge of the phone at your target
- Read the angle displayed on the screen
Practice this at home before taking it to the field. You want to be able to pull out your phone, get a reading, and put it away quickly and quietly when angle shooting in hunting situations.
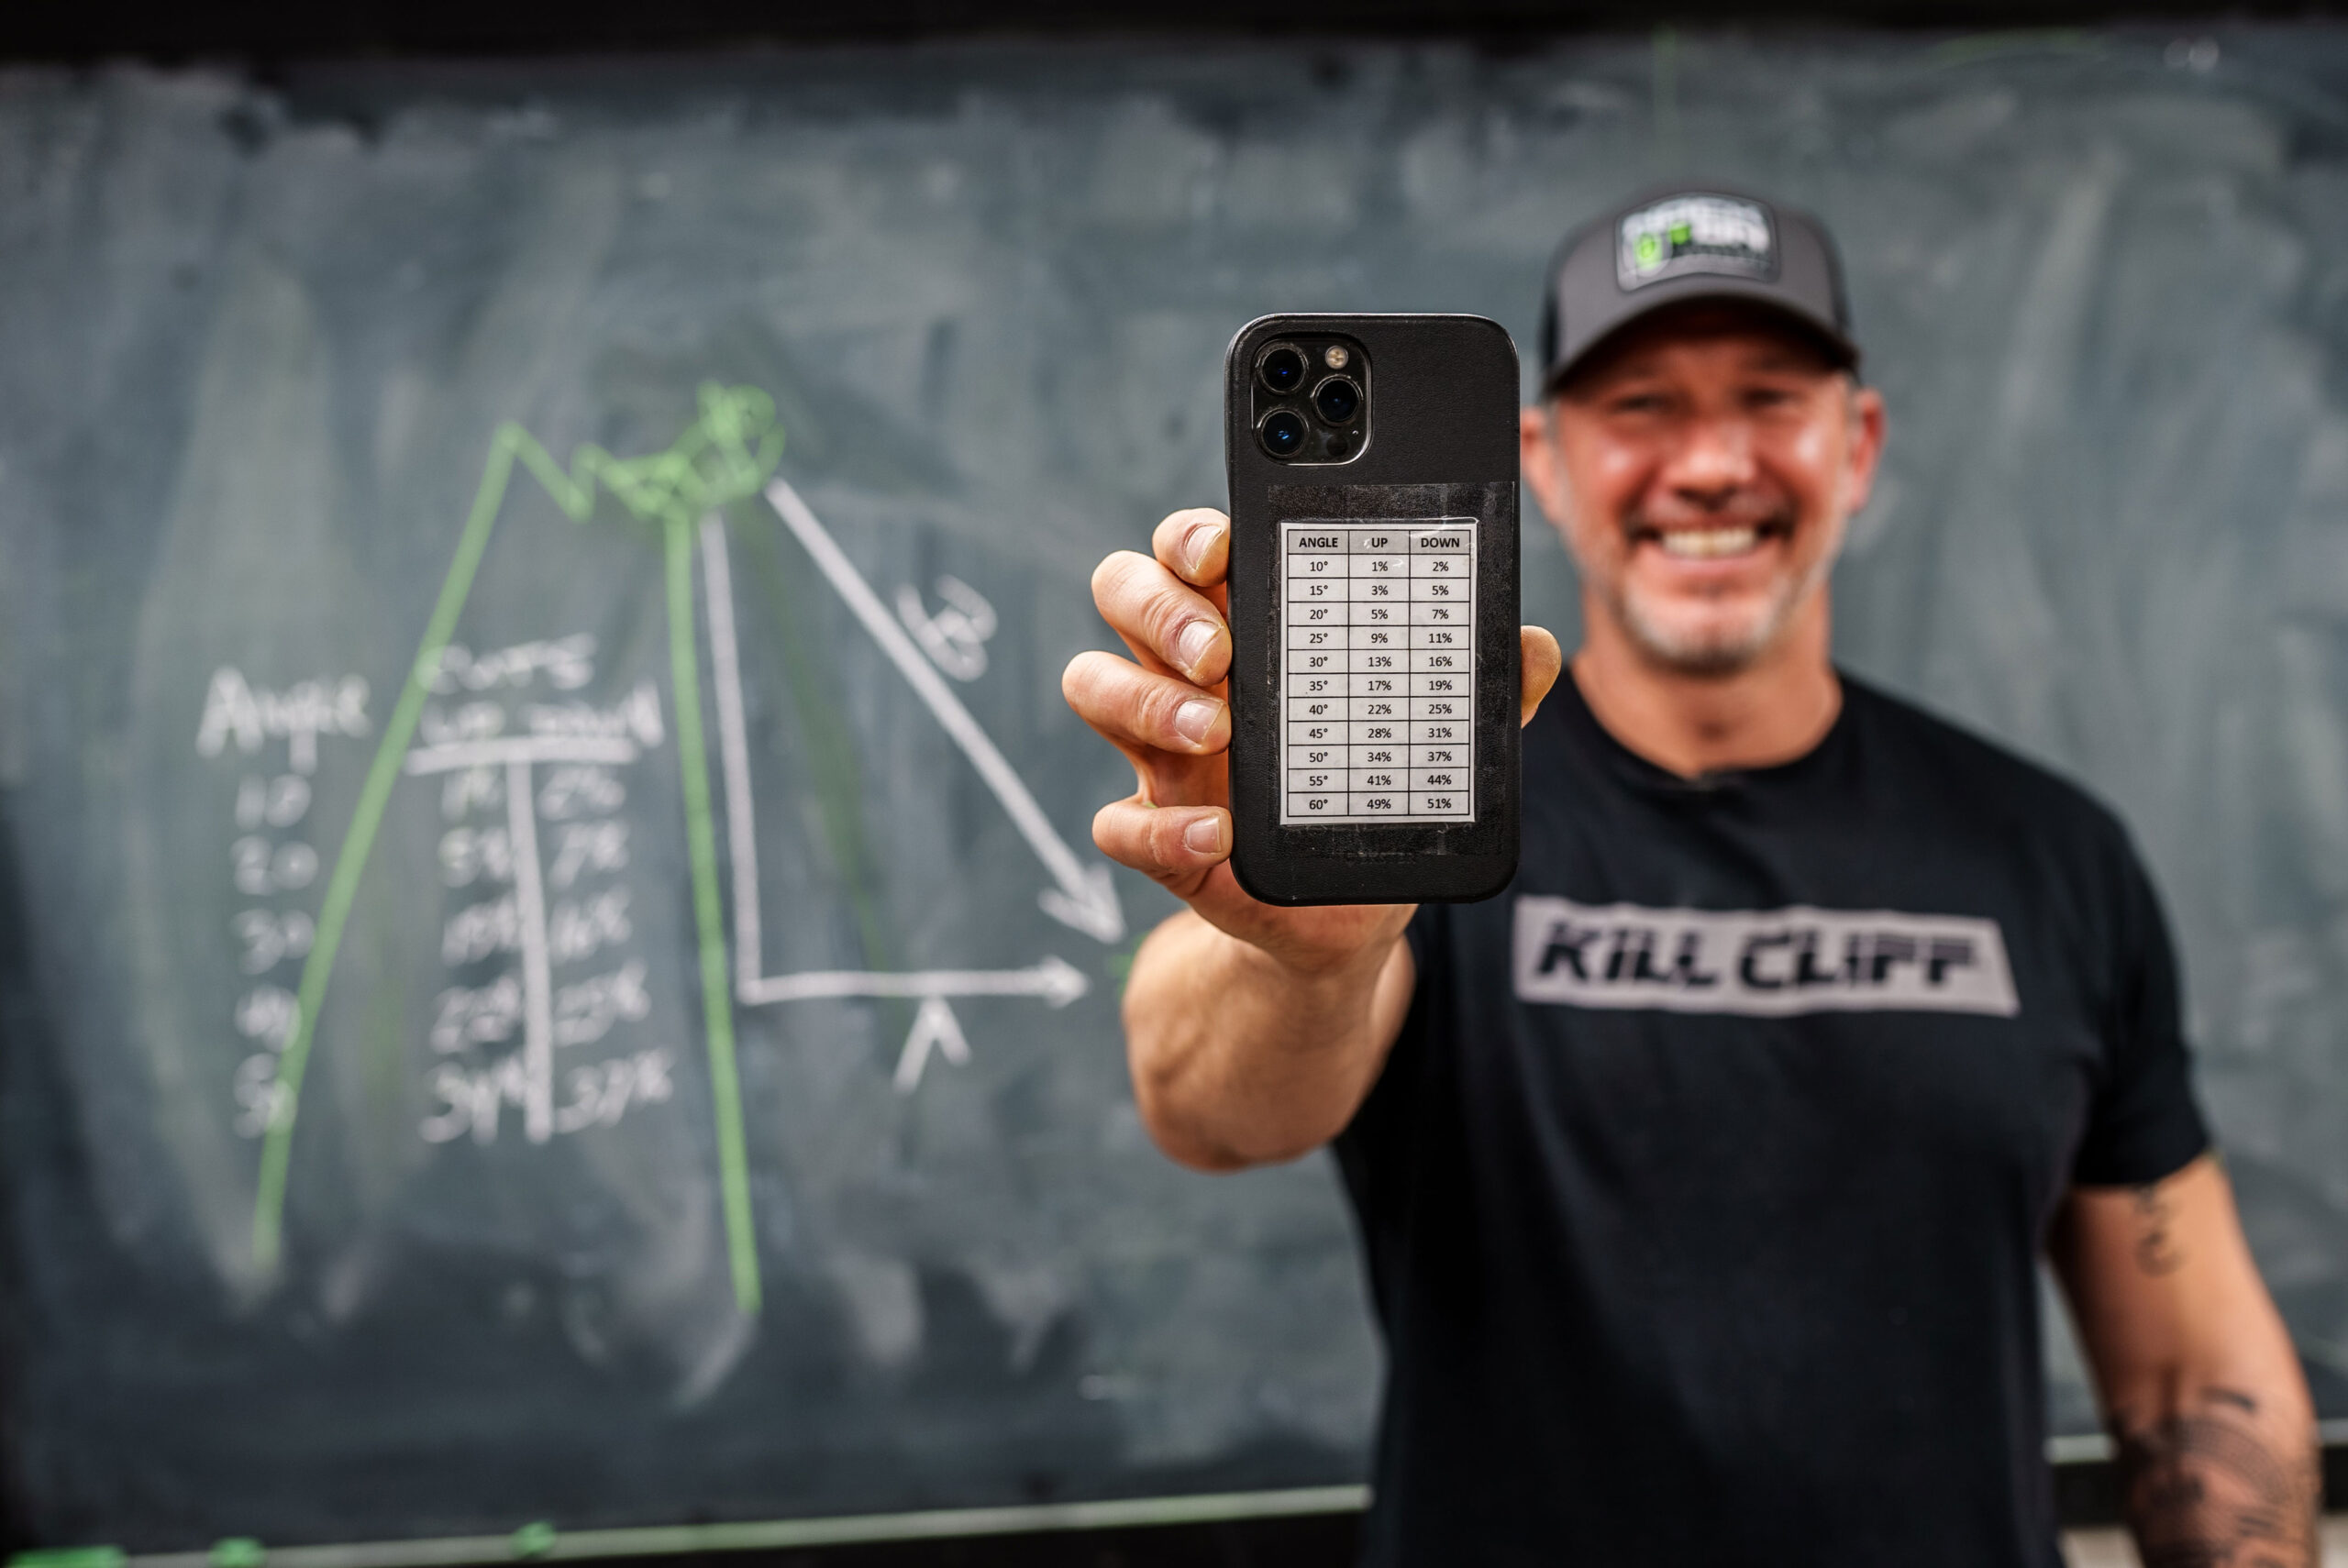
2. Your Angle Shooting Percentage Cheat Sheet
Here’s the chart I’ve refined over years of testing. This data works for most compound bow setups with modern arrow speeds:
| ANGLE | UPHILL CUT | DOWNHILL CUT |
|---|---|---|
| 10° | 1% | 2% |
| 15° | 3% | 5% |
| 20° | 5% | 7% |
| 25° | 9% | 11% |
| 30° | 13% | 16% |
| 35° | 17% | 19% |
| 40° | 22% | 25% |
| 45° | 28% | 31% |
| 50° | 34% | 37% |
| 55° | 41% | 44% |
| 60° | 49% | 51% |
You’ll notice the percentages are slightly different for uphill versus downhill angle shooting. That’s because your form and the arrow’s launch angle change slightly when shooting at extreme angles.
I recommend printing this angle shooting chart small enough to tape to the back of your phone case or rangefinder. Laminate it to protect it from the elements. When you need it, it’s right there with your angle finder.
Field Testing Your Angle Shooting System
Before trusting this method on a trophy animal, put your angle shooting technique through its paces. Here’s my testing protocol:
- Find a steep hill with safe backstop conditions
- Set targets at various distances up and down the hill
- Rangefinder the line-of-sight distance and measure the angle
- Calculate your adjusted yardage using the angle shooting chart
- Make the shot and observe where your arrow hits
- Fine-tune your personal chart based on your bow’s performance
Most archers are shocked by how accurately this angle shooting system predicts the correct aiming distance. Once you’ve verified it works with your setup, you’ll have the confidence to make those extreme angle shots count when it matters most.
Angle Shooting When Technology Fails: The Backup Plan
The best part about internalizing this system is that it gives you options when technology fails. We’ve all had electronics die at the worst possible moment. If your angle-compensating rangefinder quits on you mid-hunt, you’re not out of the game with proper angle shooting knowledge.
With your backup plan in place (a simple angle finder app and your angle shooting cheat sheet) you can still make accurate shots that would otherwise be guesswork. It’s saved my hunt more than once, and that kind of preparation separates consistent success from occasional luck.
Remember, traditional bowhunters have been making these angle shooting adjustments instinctively for centuries. Understanding the physics behind why angled shots behave differently doesn’t just make you more accurate. It makes you a more complete archer.
Conclusion: Becoming an Angle Shooting Expert
Mastering angle shooting techniques is what separates average archers from elite shooters. Even if you rely on modern rangefinders most of the time, having this angle shooting knowledge in your back pocket gives you versatility and confidence in any hunting scenario.
When that once-in-a-lifetime shot presents itself at a steep angle, you’ll be ready with your angle shooting expertise, no matter what gear you have on hand. The time you invest in understanding and practicing these angle shooting principles will pay dividends in the field for years to come.
