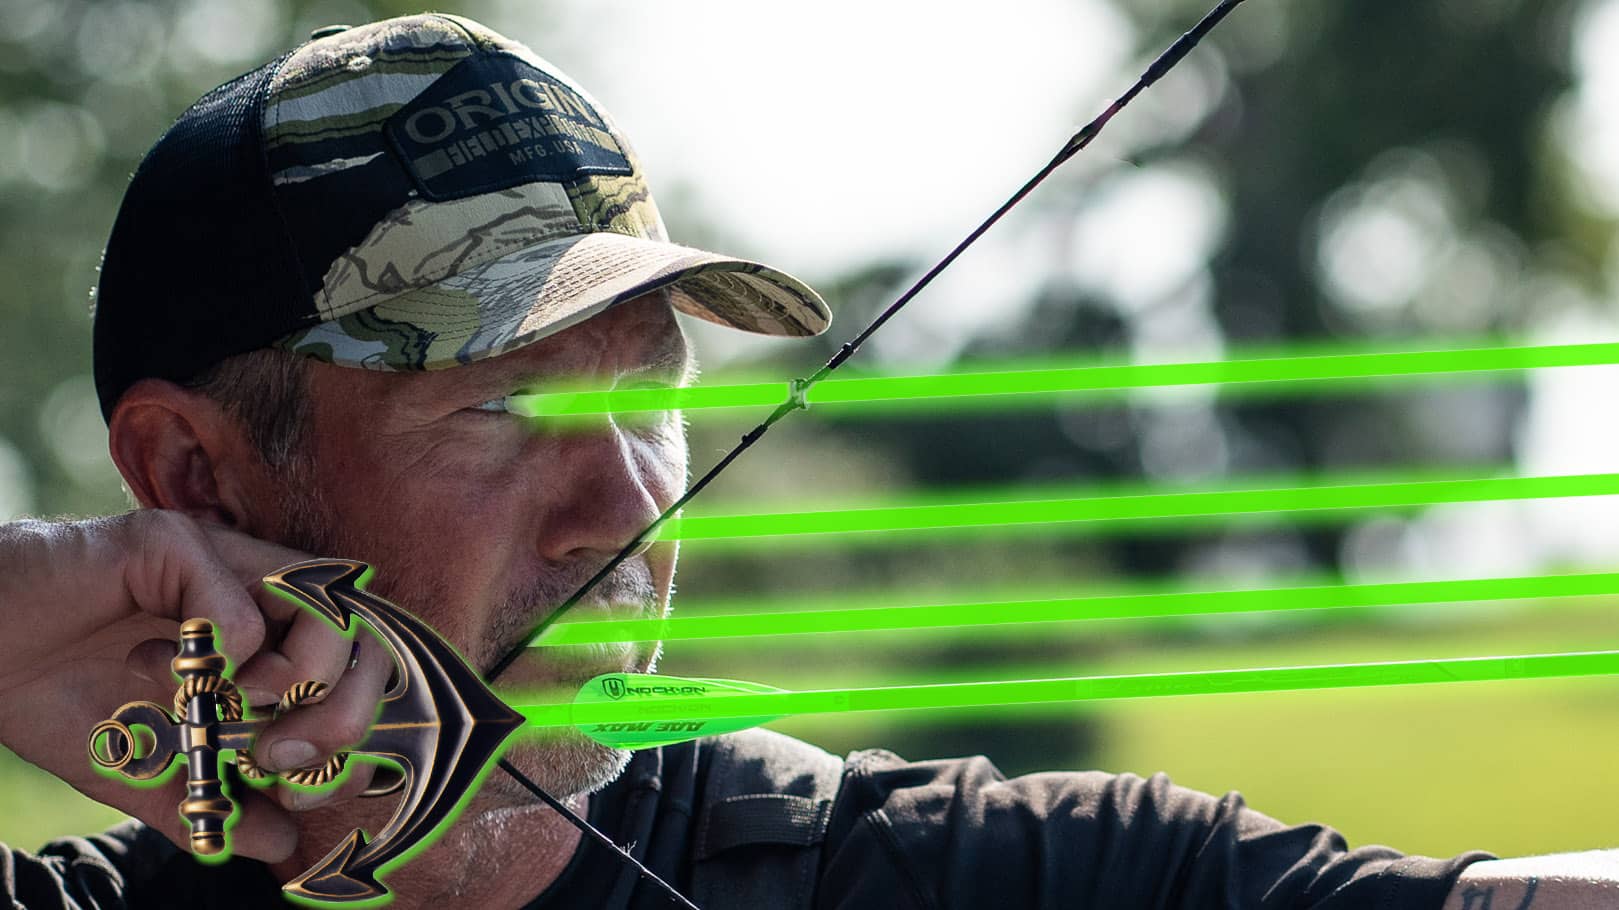
Your anchor point is the cornerstone of archery accuracy – it’s where consistency begins and confidence grows. When your anchor feels off, even by a fraction, it can be a real struggle to settle that pin on target.
Even the slightest variation in how your release hand meets your face directly impacts arrow flight.
The position of your anchor determines not just where your arrow sits on your face, but how that arrow aligns with your eye, your peep, and ultimately your target. A high anchor can force the arrow up into your mustache or lip, while dropping too low puts that shaft dangerously close to your chin bone. Either way, you’re compromising accuracy before you even start your shot sequence.
Today we’re going to break down exactly what makes a rock-solid anchor position, whether you’re shooting a handheld release or a traditional wrist strap. Let’s continue building that foundation for accuracy, one element at a time.
Understanding Anchor Position Fundamentals
Your anchor position determines exactly where that arrow sits on your face. Too low of an anchor drops the arrow onto your chin bone, where even slight head movement can push it off course. Too high, and you’re fighting contact with your lip or mustache. What we’re looking for is the “safe zone” – that natural cradle between your lip and chin where the arrow can sit without obstruction.
When your bow is at full draw, you’ve created a triangle with the string angle. Your anchor point determines where the vertex of the triangle is, and that position determines everything else.
If you’re anchored properly, that triangle naturally puts your nose slightly touching the string while keeping your head level.
Here’s what proper anchor position gives you:
- Consistent string position at the corner of your mouth
- Natural nose-to-string contact without leaning
- Perfect alignment between your eye and peep sight
- Clear arrow flight with no facial contact
Think of anchor position as setting the foundation for everything else. When your anchor puts the arrow in that safe zone, your brain can focus on aiming instead of compensating for contact or fighting inconsistent alignment.
Why It Matters
Let’s talk about why anchor position matters so much with a compound bow.
A compound bow has “Let Off,” meaning the bow’s cam system makes it easier to hold the bow back at full draw. For example, a 70lb bow with 80% let off means you are only holding 14lbs (or 20%) of the total at full draw. Due to the bow’s let-off, your arrow needs time to ramp up to the full 70lb thrust once you let it go.
Your perfect anchor is critical because the arrow actually stays next to your face for fractions of time while going from 20% holding weight up to the 100%. If your anchor is wrong, this moment in time is enough to cause misdirection to the arrow.
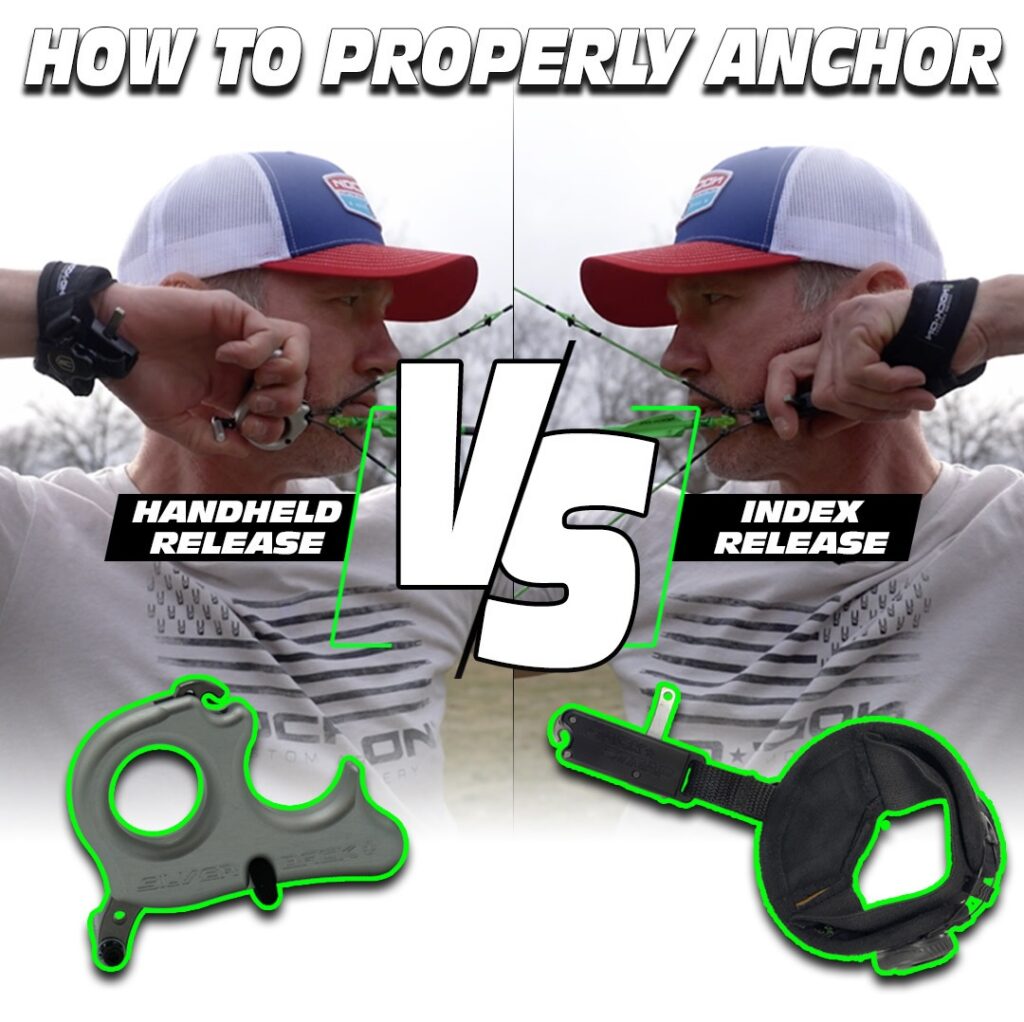
Mastering Handheld Release Technique
Let’s focus on what makes a handheld release anchor truly consistent. Whether you’re shooting a trigger or tension release, everything starts with a flat hand position. Think about laying your release along that row of knuckles, keeping your hand flat and relaxed — this minimizes variations in D-loop position and helps maintain a clean arrow flight.
With a handheld release, your anchor creates three critical contact points:
- The tip of your nose is slightly touching the string
- Your index finger sits right under your jawline
- Your middle finger rests against your gum line at the base of your molars
This position naturally places the arrow in that safe zone we talked about, giving you clean fletching clearance and consistent string alignment.
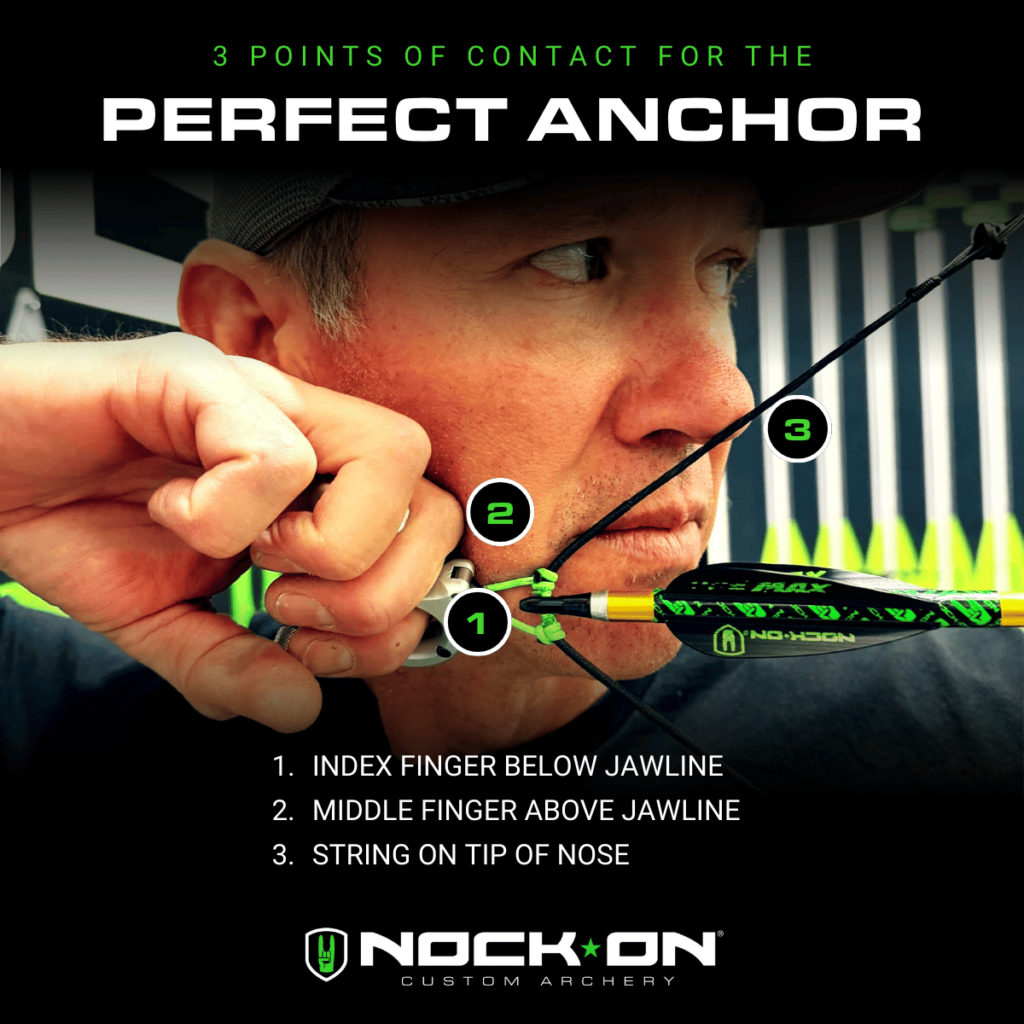
With trigger releases like the Nock 2 It, keep your thumb safely away from the trigger during your draw. Once anchored, you can smoothly bring that thumb into position without changing your hand shape.
For tension releases like the Silverback, hold that safety during the draw cycle, then simply let your thumb roll off while maintaining that flat hand position.
Before we move on, let’s address the most common handheld release mistakes that compromise accuracy:
- Making a fist around your release instead of keeping a flat hand position, forcing you to tuck behind your face and drop the arrow low
- Changing hand shape when moving to the trigger or letting off safety, which creates inconsistent anchor points
- Gripping too tight with your bottom fingers, causing unwanted torque on the D-loop
Remember: less is more. Keep that hand flat, fingers relaxed, and let the release work as designed. Think about holding onto a ledge rather than making a fist. When your hand stays flat, you’ll find your release arm naturally parallels your bow arm, setting you up for a clean follow-through.
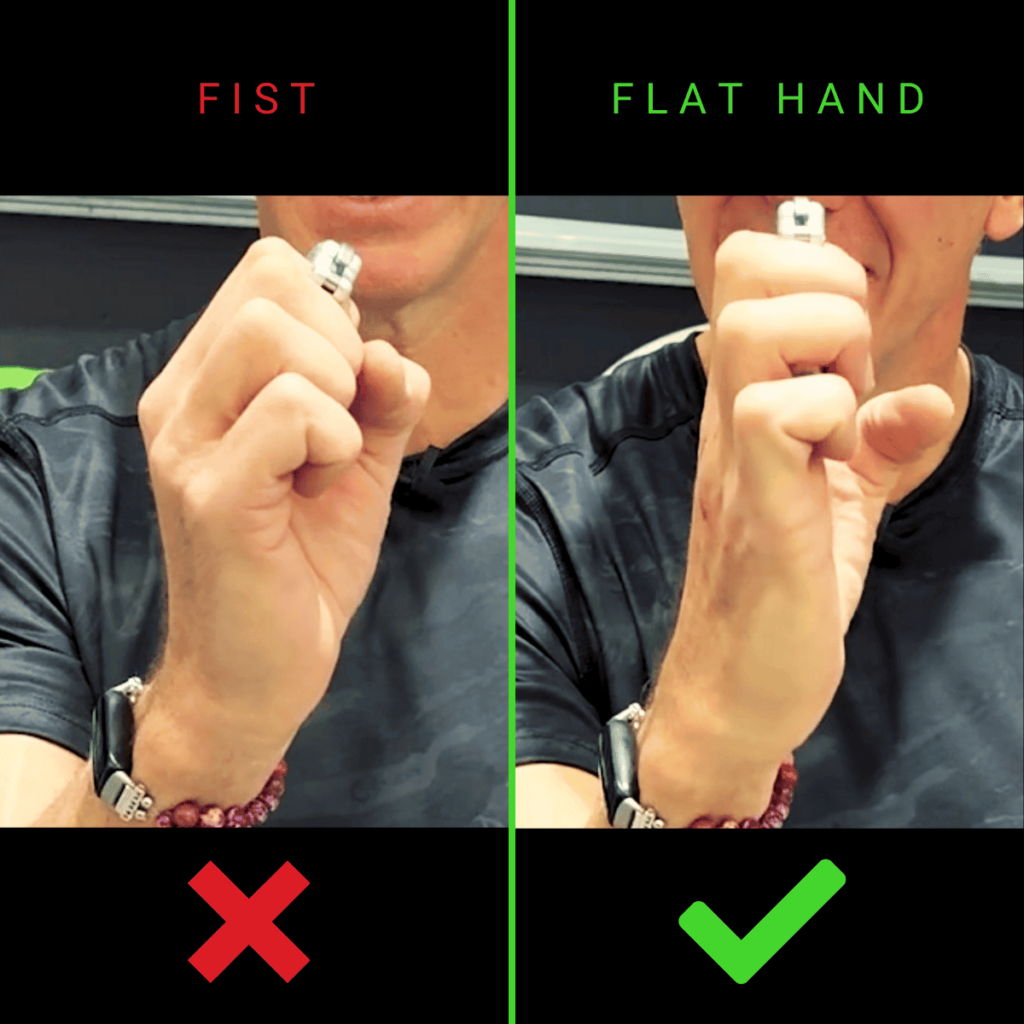
Wrist Strap Release Essentials
Shooting a wrist strap release? Your anchor fundamentals stay similar to handheld release principles, just with a slightly different orientation.
Take your release hand with your palm facing the ground and continue to pronate (rotate the back of your hand towards you) just as you would with a handheld release.
Then, place the base knuckle of your index finger at the base of your earlobe. Some people try to place the thumb behind the neck or a straight index finger down the jaw, but these end up moving the arrow shaft too low which can lead to serious accuracy issues with any head movement.
The Path to Anchor: Drawing with Purpose
Before you draw, mirror your bow hand’s position with your release hand. If your bow hand has that natural 45-degree thumb angle, your release hand should match it (thumb down) as you start your draw.
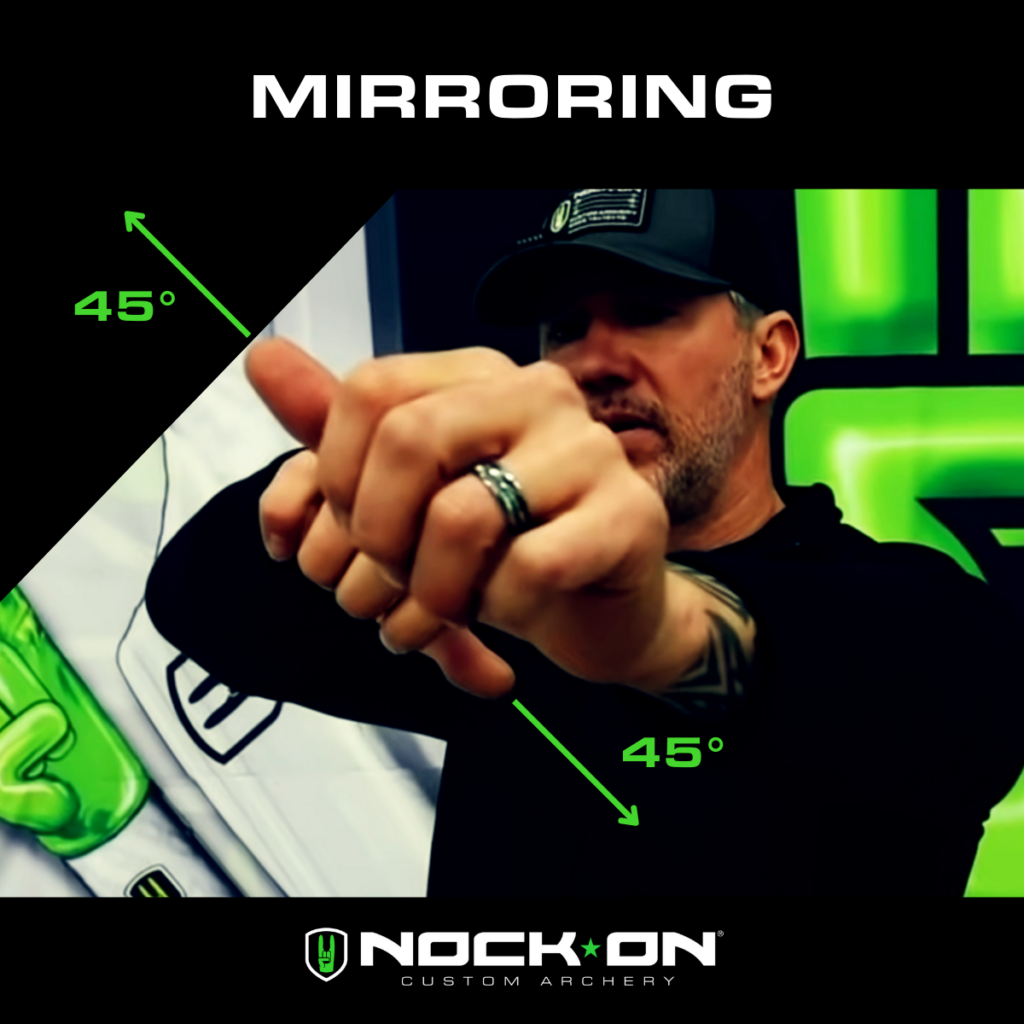
Lift the bow into position and look at your release hand before drawing. Is the hand flat and is the release down the center line of knuckles? Is your release angled correctly to mirror the shape of your face? This pre-draw check ensures you’re coming into anchor naturally instead of fighting to adjust at full draw.
Then, think about the release hand traveling like it’s on train tracks, coming straight back to your anchor point. You’re simply bringing that perfect triangle right to the side of your face.
Taking It to the Field
Your anchor position isn’t just another piece of the shot process – it’s the foundation that makes everything else possible. When you nail down these fundamentals, your brain can focus on that pin float and execute clean shots instead of fighting inconsistent form.
This week, focus on your anchor position during practice. Here’s your checklist:
- Check hand position before drawing – flat back of hand, proper release angle, release positioned down the middle row of knuckles and holding on tightly.
- Mirror your bow hand’s thumb angle with your release hand
- Verify contact points at full draw – index finger under jaw, middle finger on gum line, nose to string
- Maintain level head position throughout the shot
Don’t rush this process. Remember, accuracy is about being repeatable. Take the time to build these habits now, and you’ll see the results downrange when it counts. Your anchor is your home base for every shot. Make it count.



 massmonopoly